


We are having the first huge snowstorm here in years. I don't know how many. A lot. We actually got blizzard warnings for today and in the 12 years I've lived in the South, I've never seen a blizzard warning. 

I grew up in the Midwest where blizzards are common in the winter and white-outs wreak havoc on anyone outside. This looks like what I remember as a child...not our "southern snow."
The News Channels are saying it's the biggest storm in about 50 years and covers a HUGE portion of the United States.
The above picture was taken at 10am this morning and it looks like dusk.
I let the 2 oldest boys get all dressed up in their winter wear and sent them out to the front yard. We're surrounded by trees, so the wind isn't as bad as an open field, but after about 10 minutes (longer than I thought they'd last) they came back inside near tears with wind chapped faces. They didn't ask to go out again until I needed to check on our mother goat who is due THIS WEEK! Of course it'd be our coldest week of the year.
School is cancelled and we got started on our Snow Day Activities.
Baking with wholesome goodness
 I don't bake all that often. It takes up a lot of time and with lots of little people in the house I don't get many blocks of time to cook up anything other than what I need to make for meals. Today though with the snow blowing outside, I wanted to cook us up a little bit of summer.
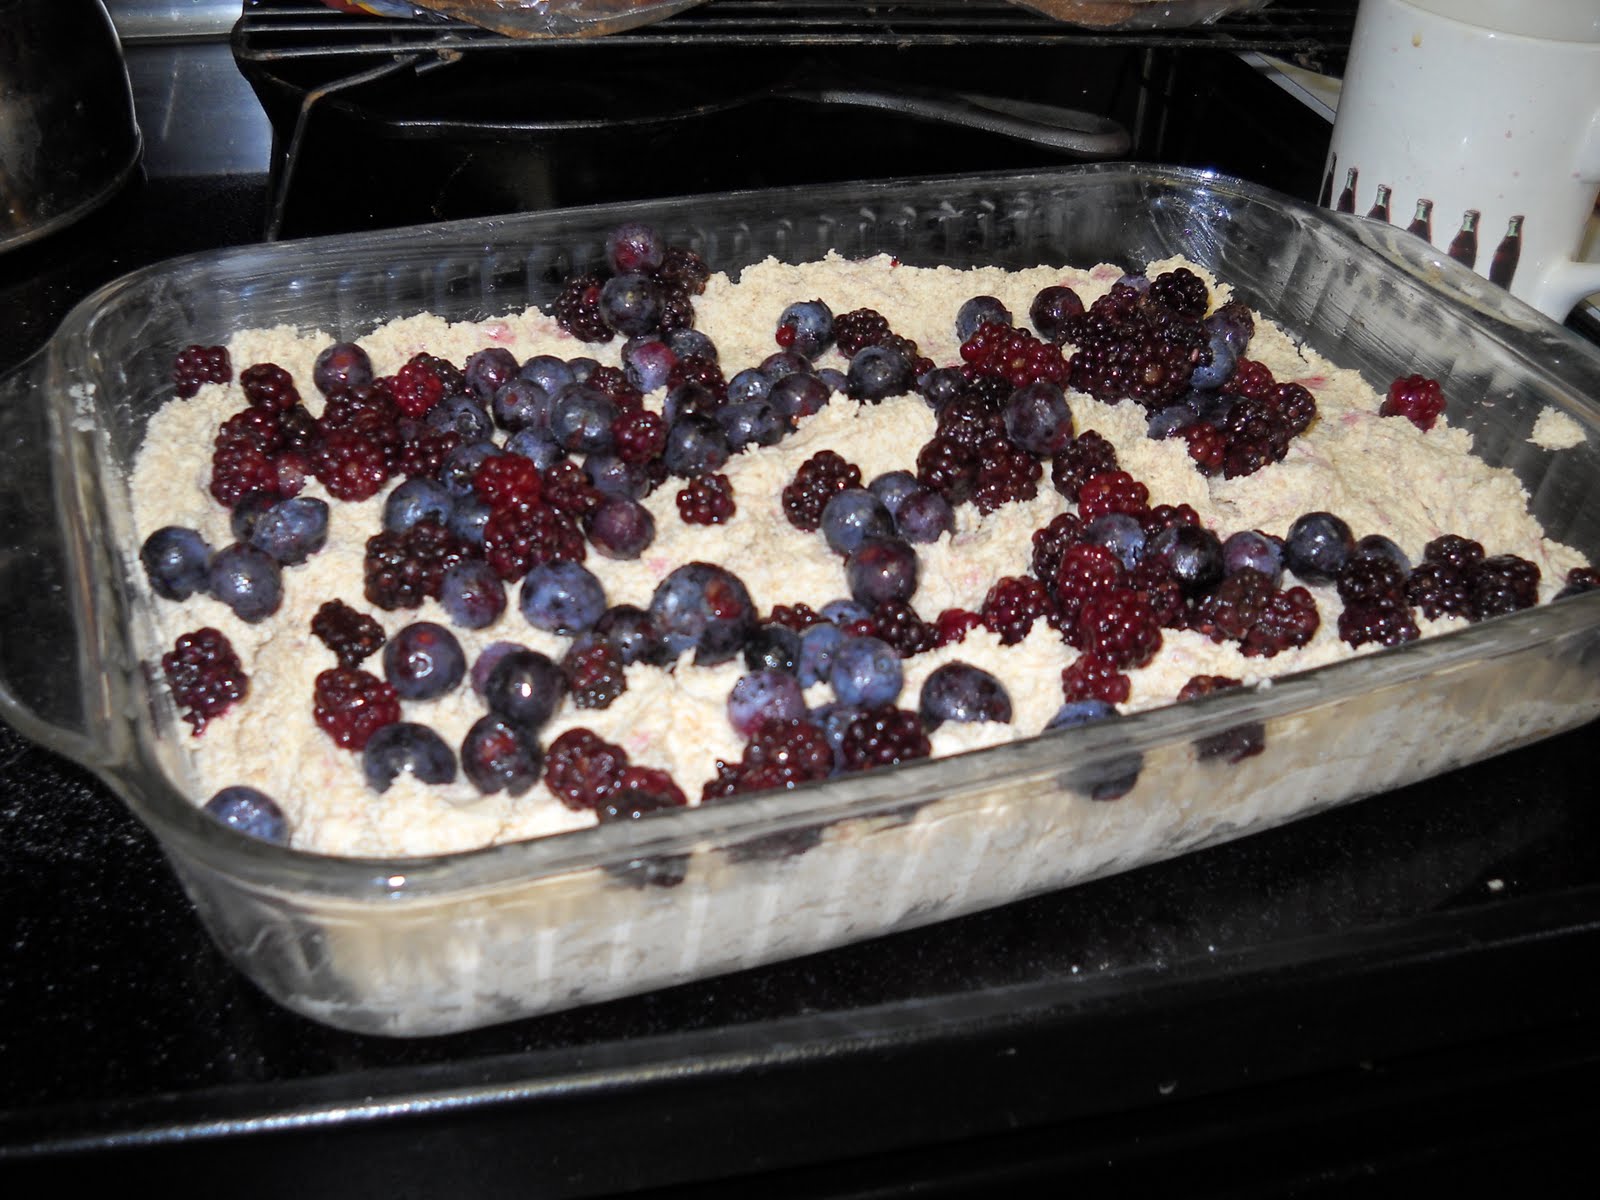
Blueberry and Blackberry Buckle. I made it with whole wheat flour, and blueberries and blackberries that we picked at a local blueberry farm and from our pasture last summer.
 Mr. Smiles helped me dump all the berries on top...
 ....and he sampled a few just to make sure they "were OK to eat."
Precious Jewel and I had been looking on-line for some fun Valentine crafts to put together. The more she can cut, paste, draw, glue, color, etc.....the happier she is. Family Fun had some really fun and inexpensive Valentine's Card Crafts that pretty much only required paper, scissors, tape and glue. She picked the messiest one to start with of course and we all "went to town." First, using a hand-held pencil sharpener, we shredded whatever color of crayons they wanted onto pieces of wax paper.

 It was funny watching the different personalities of the kids come out in just this part of the process. Mr. Smiles would shred and then scrape it all into a neat pile in the center; then shred and scrape and shred and scrape.
 Good Lookin' shredded his crayon and then in his awesomeness blew it across the table. He was banned from the table for about 5 minutes until he agreed not to blow his or anyone else's shredded crayons. Hehe.
Precious Jewel shredded hers text book style: just like the picture on the computer. Not too neat and not to messy.
 Second, we pulled out a paper Aldi's bag to cover the table and to soak up any excess crayon wax. Then we covered it with Good Lookin's yellow/orange mixture of shredded crayons on wax paper and covered it with another piece of wax paper.
 Third: The website said to cover it with another flattened paper bag, but I just used an old washcloth. It worked fine.
 Fourth: We pulled out the iron and began slowly ironing the top of our little projects. I let the older 3 do theirs with help, but obviously did Nater Maters for him. He'd lost interest after we finished shredding crayons anyway.
 I thought they all did pretty good myself.
 Five: Test it to make sure it's not too hot before cutting out the shape. Make sure it all evenly melts and if there are gaps it's fine.
Pretty huh? : )
 Six: Cut out the shapes! We chose hearts for Valentine's Day, but any shape can be made.


 I got involved in helping them more and forgot to take pictures of the next steps, but you basically cut a piece of paper into four equal parts and then cut holes out of the center. I just did several stacks together at a time.
 I don't bake all that often. It takes up a lot of time and with lots of little people in the house I don't get many blocks of time to cook up anything other than what I need to make for meals. Today though with the snow blowing outside, I wanted to cook us up a little bit of summer.
Blueberry and Blackberry Buckle. I made it with whole wheat flour, and blueberries and blackberries that we picked at a local blueberry farm and from our pasture last summer.
 Mr. Smiles helped me dump all the berries on top...
 ....and he sampled a few just to make sure they "were OK to eat."
Precious Jewel and I had been looking on-line for some fun Valentine crafts to put together. The more she can cut, paste, draw, glue, color, etc.....the happier she is. Family Fun had some really fun and inexpensive Valentine's Card Crafts that pretty much only required paper, scissors, tape and glue. She picked the messiest one to start with of course and we all "went to town."
This was a little 3-Dimensional Card made from melted crayons. Even Nater Mater could get in on the messy action.
 First, using a hand-held pencil sharpener, we shredded whatever color of crayons they wanted onto pieces of wax paper.
 It was funny watching the different personalities of the kids come out in just this part of the process. Mr. Smiles would shred and then scrape it all into a neat pile in the center; then shred and scrape and shred and scrape.
 Good Lookin' shredded his crayon and then in his awesomeness blew it across the table. He was banned from the table for about 5 minutes until he agreed not to blow his or anyone else's shredded crayons. Hehe.
Precious Jewel shredded hers text book style: just like the picture on the computer. Not too neat and not to messy.
 Second, we pulled out a paper Aldi's bag to cover the table and to soak up any excess crayon wax. Then we covered it with Good Lookin's yellow/orange mixture of shredded crayons on wax paper and covered it with another piece of wax paper.
 Third: The website said to cover it with another flattened paper bag, but I just used an old washcloth. It worked fine.
 Fourth: We pulled out the iron and began slowly ironing the top of our little projects. I let the older 3 do theirs with help, but obviously did Nater Maters for him. He'd lost interest after we finished shredding crayons anyway.
 I thought they all did pretty good myself.
 Five: Test it to make sure it's not too hot before cutting out the shape. Make sure it all evenly melts and if there are gaps it's fine.
Pretty huh? : )
 Six: Cut out the shapes! We chose hearts for Valentine's Day, but any shape can be made.

 I got involved in helping them more and forgot to take pictures of the next steps, but you basically cut a piece of paper into four equal parts and then cut holes out of the center. I just did several stacks together at a time.
 Then I cut a notch into the top and bottom on the outside of one piece of paper and a notch on the top and bottom on the inside of the second piece of paper. Hook them together and you have a 3-D card that just needs it's hanging heart!
 A little string and a little scotch tape and viola! It's finished!
 Our first row of cute Valentine's Cards!
 We're going to make lollipop cards this afternoon.
 A little string and a little scotch tape and viola! It's finished!
 Our first row of cute Valentine's Cards!
 We're going to make lollipop cards this afternoon.

1 comment:
those look so great!!! how fun! and yeah for blizzards!... bet you never thought you'd feel that way!;)
Post a Comment